
“Oi, marketing!” Said AM account manager Nevdish, much more politely than that. “Where’s the Spotlight article on the Client List and Reporting? We talk about it non-stop with users.” Here it is Nevdish, with our apologies.
Last year, we wrote 11 articles highlighting the coolest features in AM. Being ‘in marketing’ we were attracted to the ones with good names: Automated Reminders, Automated Tasks, Onboarding, The Client Portal… ‘How exciting can a Client List be?’ we thought.
How wrong we were.
Reports that automatically update
You can do a number of things with the Client List, but the most powerful has to be living – or ‘dynamic’ – reports. Rather than generating a report and printing it off, you can have reports running in the background, constantly updating as things change. That’s because our Client List isn’t just one list, it’s every possible list you’ll ever need of your clients.
We’ll take you through 5 steps to explore AM’s Client List. You could follow these if you’re on your free 30-day trial.
We said it about the workflow and we’ll say it again. This is how AM’s Client List and Reporting works at the moment. We have big plans to considerably expand on the reporting capability in AM.
Introducing… the Client List

This is how the Client List looks once you’ve added your clients (step 1). However, you can change your view, by deciding which columns you want to see (step 2). And filter your clients in hundreds of different ways (step 3). This is how you select who will receive client-segmented emails (step 4) and create your living – or ‘dynamic’ – reports (step 5).
Step 1: Import your clients – and don’t panic
The Client List and the details of each client power every feature in AccountancyManager. So the first thing you need to do is add your clients. Your clients won’t receive anything automatic unless you want them to and you’ll still have your old processes to fall back on while you get comfortable with AM.
Import clients using an Excel spreadsheet: We provide you with an Excel spreadsheet template, so you can organise your clients and their details in a way that AM understands.
Save time by pulling client details and deadlines from Companies House: Once you’ve added new clients (either individually or as a big list) connect AM with Companies House. This will pull through things like the clients’ company address, main contact details and accounting periods and filing deadlines.
Step 2: Choose different columns to customise your Client List
Although it doesn’t look like Excel, AccountancyManager is an evolution of the spreadsheets accountants and bookkeepers tend to create. AM is effectively all your spreadsheets combined.
One of the (many) things AM allows you to do, that Excel doesn’t, is add in and take away columns and see all the relevant data straightaway. So if you usually have different spreadsheets, with different columns, you can see all this data just by updating the columns.
A crucial difference between spreadsheets and AccountancyManager, is that AM constantly updates. As deadlines come and go, clients send and sign documents and you get on with more important work than updating spreadsheets.

Here are the first few options you see when you click the ‘Columns’ button over on the right, but there are many others.
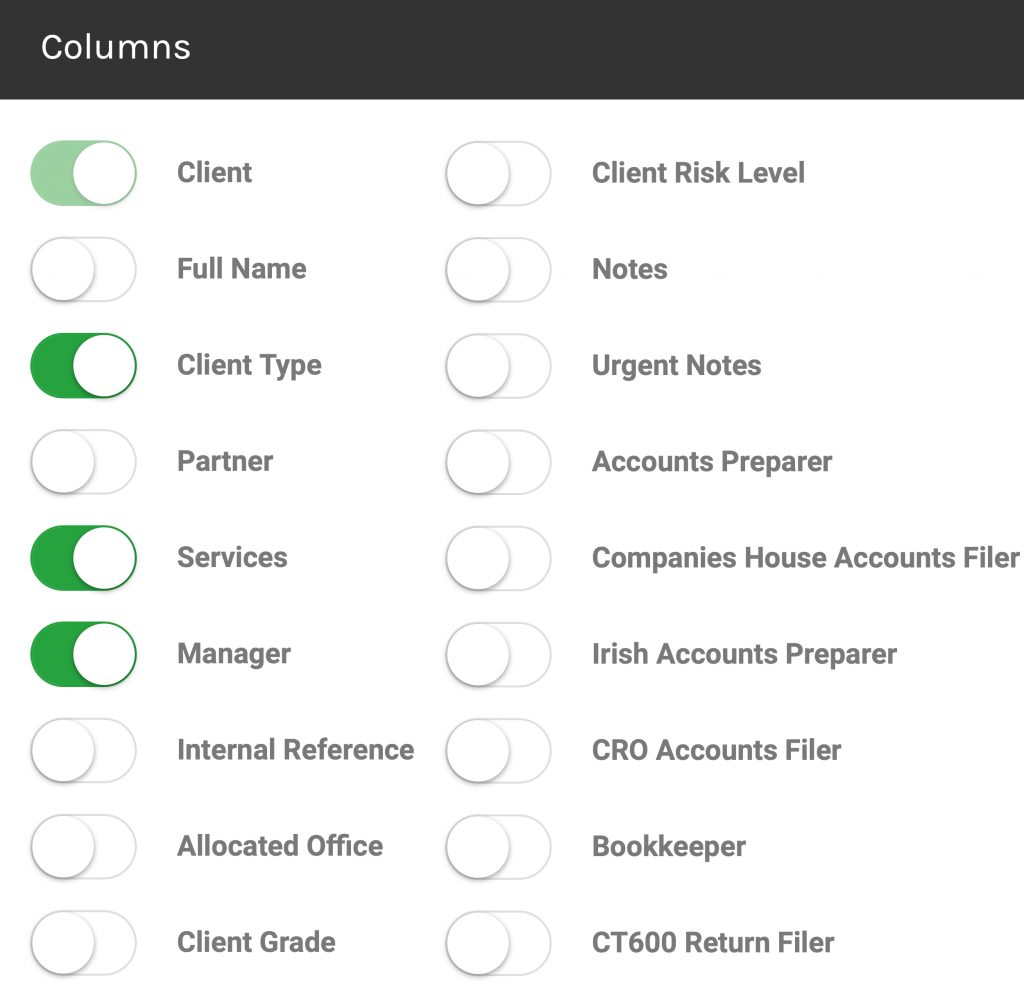
Most AM users will have a favourite ‘view’ (or selection of columns) that they keep switched on in their Client List. Then change the columns to generate new reports, either as a one off, or as bookmarked lists (dynamic reports).
Step 3: Quick Filter – and Advanced Filter – your clients
Once you have the columns you want, you can choose to only see certain clients – or ‘filter’ down your list. Just like when you’re searching for the right hotel and you choose to see only seafront hotels or accommodation with kids activities. In AM, you can filter by any data that sits within the columns you’ve picked.
Quick Filter: Click on underlined text to filter down your Client List
In this example, you could click on ‘Self Assessment Tax Return’ to see only the clients for whom you process self assessment tax returns. Or you can click on a specific client manager, in the Manager column or type of client under Client Type.

Advanced Filter: Explore your clientbase in hundreds of different ways

As soon as you see the list of filters you can apply, you’ll start thinking of all the different ‘reports’ you could run. There are far too many Advanced Filters to show here, but here’s are a few snapshots as an example:


On her one-on-one demos of AM, Nevdish uses this example, so that you can see a full list of clients who have VAT Returns due before the end of the month:
VAT > VAT Period End > Equals > 31 Aug 2021
First, make sure that you’ve added the VAT Service column and filter ‘Yes’.
Now search for VAT in the search bar and choose VAT Period End:

Choose VAT Period End:

Choose Equals:

Then add your date, for this example we’ve picked the end of August 2021.

Step 4: Bookmarks: Save your filtered lists as dynamic reports
Ok, these definitely need a better name. Bookmarks are how you create your dynamic reports. Effectively, you are rearranging your Client List using the columns and filters, seeing the information you need – like we just did – then saving that exact view so you can revisit it whenever you like.
“Users like to filter these reports so that they can see a snapshot of exactly how many clients use a particular service and the progress of service-related tasks.”
– Nevdish, AM Account Manager
This saves you from having to apply columns and filters each time to check certain information. You can simply ‘bookmark’ the Client List view (like you’d bookmark websites in your browser to come back to). The information within your bookmarked filtered list will automatically change as things change across your practice.
You could create reports to see how many clients use a particular service, what their fees are, find out which clients have been marked as ‘records received’ – and thousands of other insights.
““The Clients List is one of my favourite pages. You can create lists based on filters like – the nature of the business, services required, tax due dates… Then just save these filtered lists as bookmarks, to come back to, monitor, email or report on. It’s ace.”
– Liston, AM Support and QA specialist
If you have AccountancyManager, or you’re on your free 30-day trial, you’ll find a video on bookmarks in the Need help? Section. In this video we show how to set up and use bookmarks

Step 5: Email All and SMS All: Bulk contact all clients or a filtered list of clients
These emails and texts shouldn’t be confused with the automated emails and texts that AccountancyManager sends to your clients. Those are automatically fired off to specific clients at the right times – depending on their accounting dates and deadlines.
‘Email All’ and ‘SMS All’ do what they say on the tin. When your Client List is showing all of your clients, hit Email All or SMS All write your email or text, hit Send and every client will receive it. Or you can choose to pause your queue of emails – just like with your automated emails.
If you’d just like to email or text a certain group of clients, filter your list first, then hit Email All or SMS All. For example, you may want to contact VAT registered clients, or clients with a certain client manager at your firm, or those with deadlines in the next 30 days, or… hundreds of other options.
Useful when Rishi Sunak has a new idea every day
Our users found these segmented bulk emails particularly useful back in April last year when Government announcements came thick and fast (though not always accompanied with many details.)
But wait… bulk (and automated) emails and texts can look unique to each client
This is where things get even more clever. Using ‘Variables’ you can pull all kinds of details, unique to each client, into the email template. Nevdish describes variables as placeholders.
In your email or text template a variable looks like this: %FIRSTNAME%. In their email or text your clients would see their own first name.
In AM, there are over 500 different variables that can pull all kinds of information into your email or text templates. We go into more detail in our article about email templates, but here are a few examples:


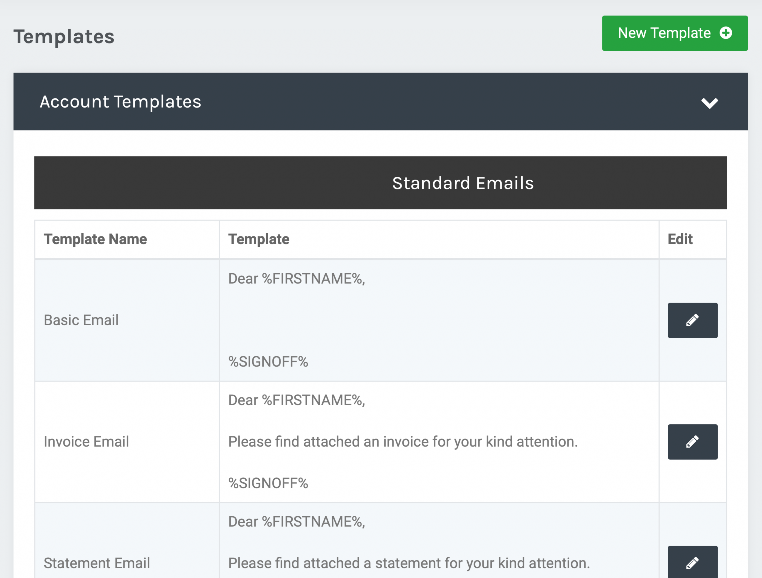
To see the full list of variables in AM, go to Settings > Templates:

Pick a template to edit or click ‘New Template’:
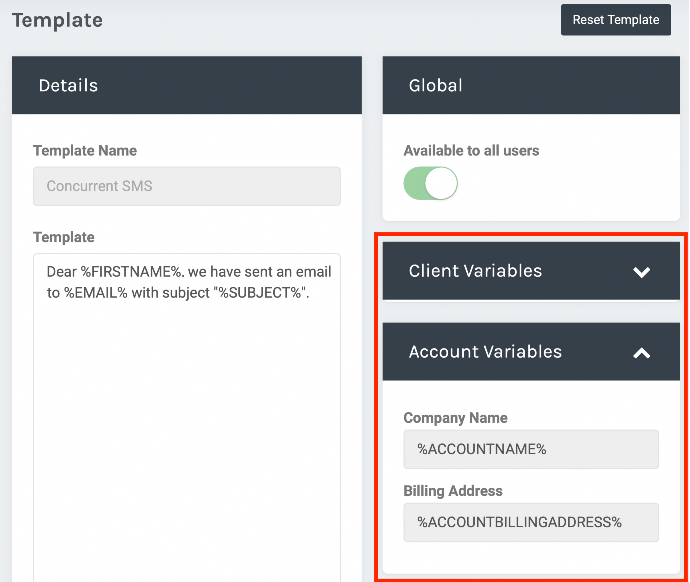
Choose your type of template (we’ll pick SMS Template):

Then click on the Client Variables and Account Variables dropdowns on the right hand side to see all the options:
Try AccountancyManager free for 30 days
If you have any questions about AccountancyManager, feel free to give us a call on 01926 355366. Or jump straight in with a 30 day trial and we’ll be in touch to give you a demo.